Tasks
A task is a piece of work, always relating an asset, assigned to a user (s) to complete by a set date at a priority level. The Task subsystem allows you or your team to complete assigned tasks. You can create tasks as part of your inspection process or as a standalone activity. The different types of tasks include:- Safety (for thorough-examinations)
- Checkup (for pre-starts, before use and after-use) and
- Maintenance (for calibrations)
Creating a Safety task
In your Inspection checklist, every response gives you the ability to capture and attach a photo, add a note and create a task for a person to follow up and complete.Scheduling a task
To create a task- Click on “Task” on the LHS menu
- Click on “Task” in the Task Dashboard
- Click on “Schedule New Task”
- Enter the task title (mandatory)
- Enter a Description (optional)
- Click on the Select dropdown to select the type of task
- Search and select a checklist for Inspections or for the user to follow
- Set to “No Repeats” for one-off actions or set frequency and date range.
- Select the Priority of the action
- Select the user (s) assigned to complete the action
- Pick the assets by either scanning in the EZYiD tag or picking from the asset table.
- Click on Save Task.
Task creation workflow
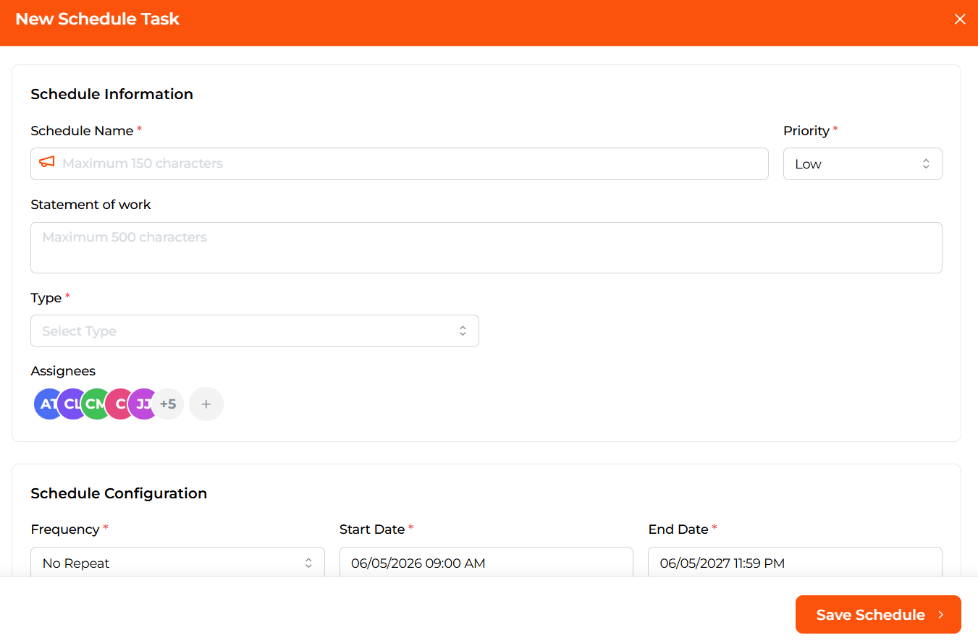
- Enter a Task Name
- Select your Task type
- Select the Checklist to be completed when executing the task
- Assign the task to one or more users
- Lastly, set the scheduled frequency, Start and end dates
- You can also set the days of week, month etc for specific days.
Completing a task
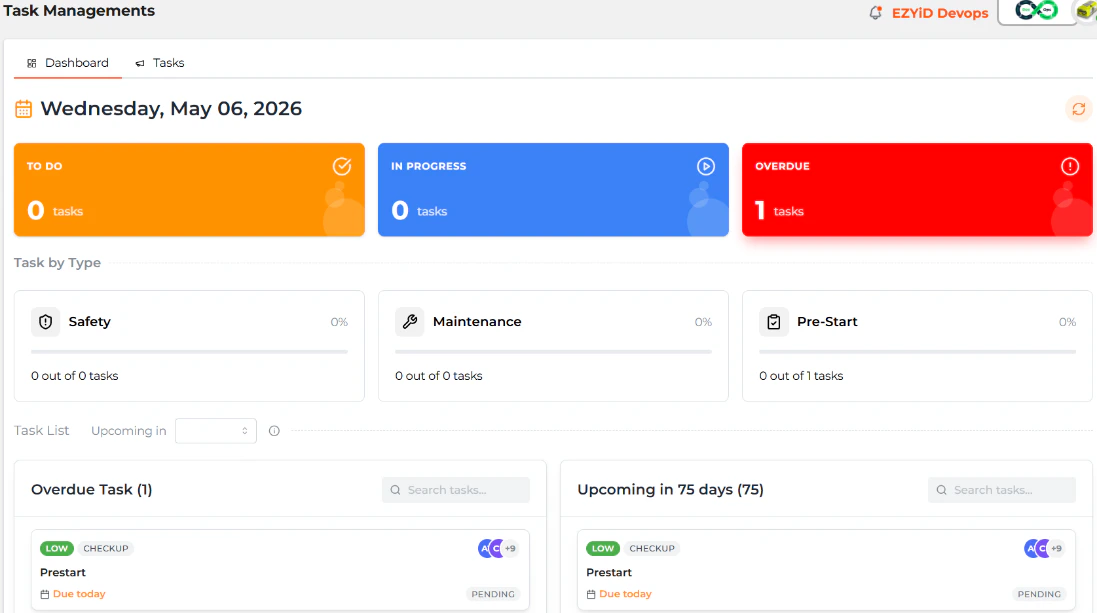
- On your task dashboard Click on today’s tasks or the Overdue tasks
- Click on “View Task” to open the task
- In the Task Completion page,
- Start Scanning your inspected assets
- This will record the asset being picked and will move from the “Scheduled” tab to the “Picked” tab.
- If there are asset records in the scheduled tab, but do not have any physical assets for inspection, you will need to Click on the “Mark as Missing” to clear the scheduled tab
- Click on the “Picked” tab and
- Click on “Perform Task”
- Note: you will not be able to perform the task until all assets have been cleared from the Scheduled tab.
- Complete the Checklist questions and Select the “Mark as Completed” button to return to the task page
To close the task,
Select the “Complete Task” button to close the task.Printing a Task report
- Click on the “Download Report” button to print a PDF report of the task checklist and all inspections completed.