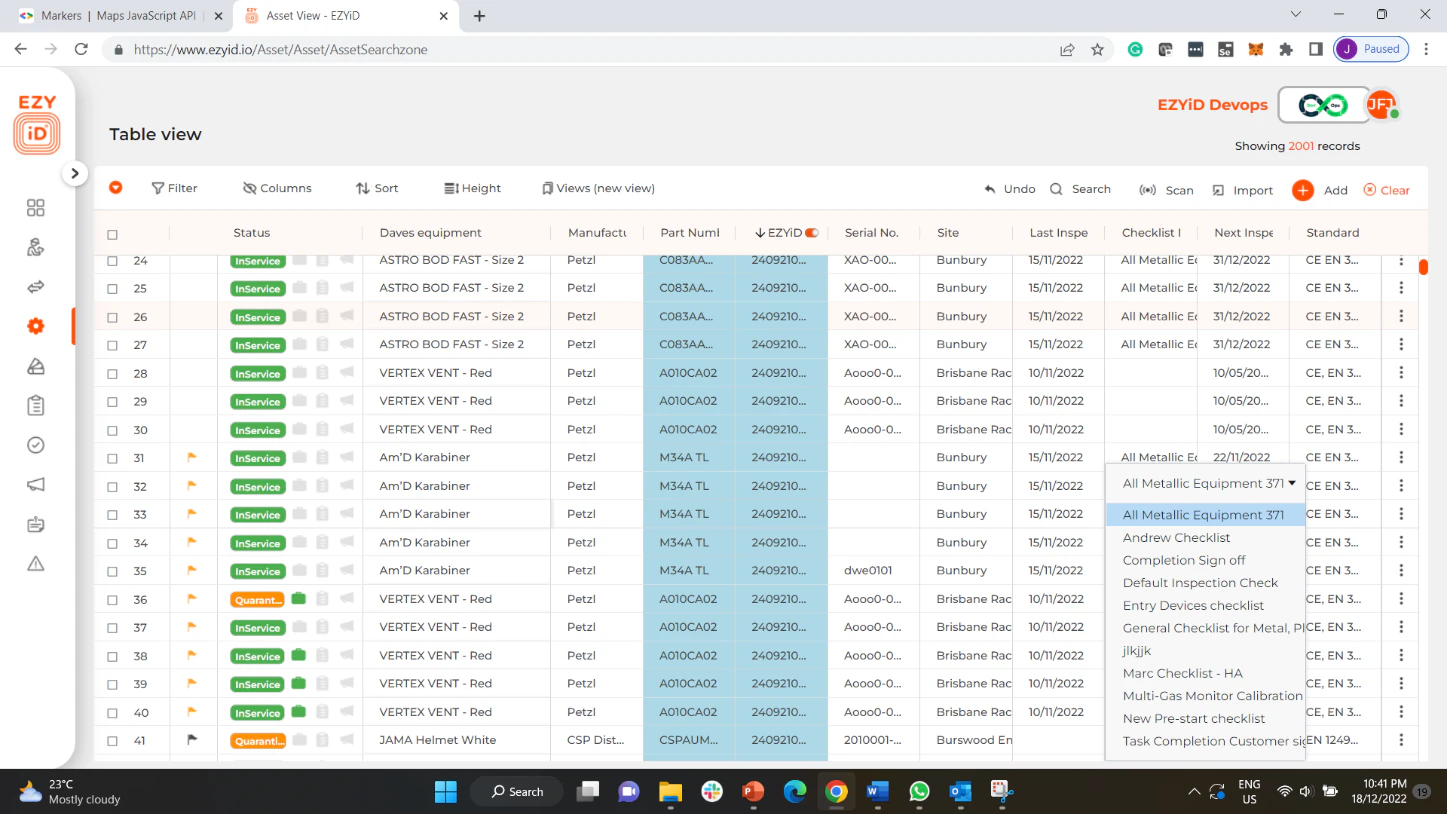
Table Navigation bar
The table navigation bar is the key to your record maintenance and analytics functions.
Table Menu
The Table menu allows you to undertake actions on your table view dataset. The generic actions include Export to excel and reports. When you select more than one record, your global actions are enabled. Refer to the Shortcut section for a detailed explanation. On the LHS, the table menu dropdown allows you to export your data records. Click on the menu dropdown to select the options.
Export – allows you to download the records in your table view, Click on the “Export” option in the Table Menu to download the list to excel for editing and reporting. You can also print the records to a PDF file to be able to present to customers.
Click on the menu dropdown to select the options.
Export – allows you to download the records in your table view, Click on the “Export” option in the Table Menu to download the list to excel for editing and reporting. You can also print the records to a PDF file to be able to present to customers.
Filters
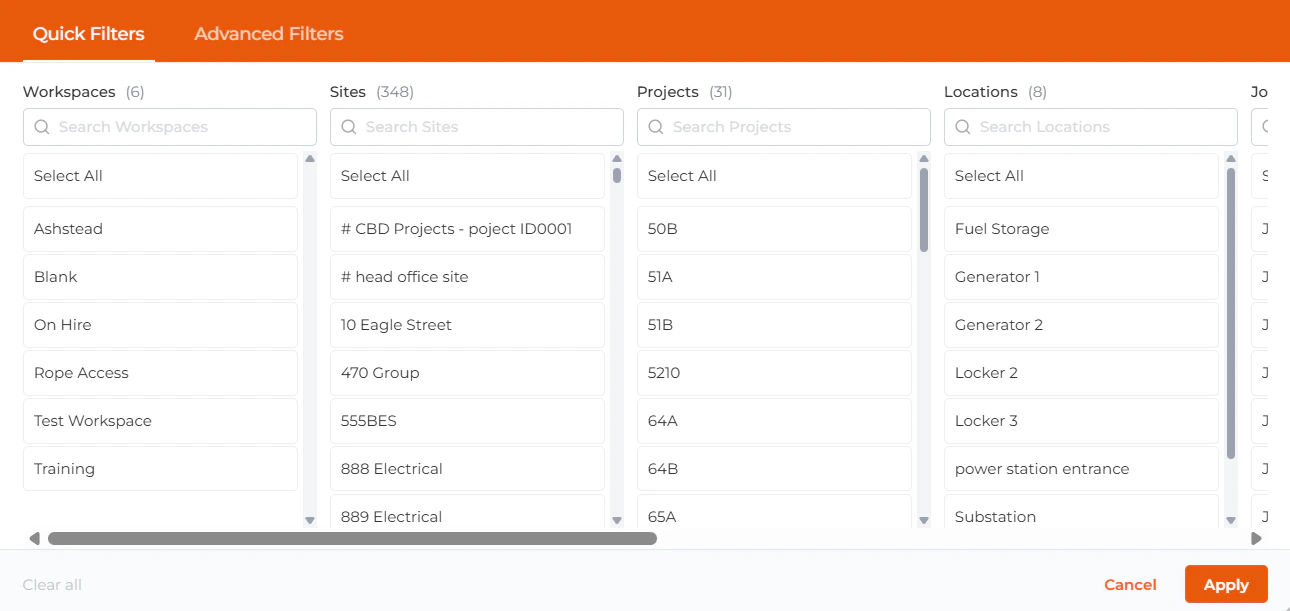
- Click on the “
 Filter” button in the Table navigation bar
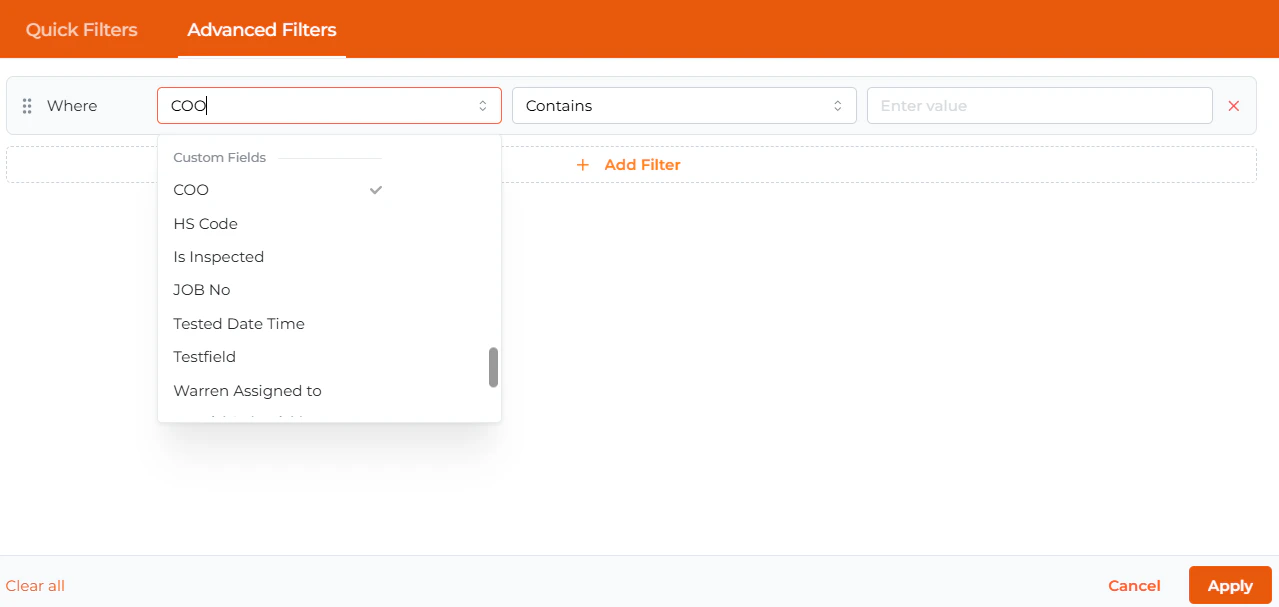
 - The Filter function has:
- Quick filter;
- Advanced filter
Columns
- The columns button allows you to hide or display and reorganise your table view column list.
- To hide columns or display additional columns in the table view, click on the Columns button in the header bar to bring up the Columns dialog.
- When the Columns dialog is open, you can see which columns are visible (where the toggle is orange and switched to the right) and which fields are hidden (where the toggle is grayed out and switched to the left).
- To find a column, you can also type the name to find the column in the “Find the column” search box at the top of the columns dialog.
- To reorganise the column order on the table view, drag the column name or the drag handles to the left.
Sorting
- To sort your table view by the desired column, click on the column header and the records will be sorted by the column in ascending order. Clicking the second time, will resort the records in descending order.
- If you need to sort more than 1 column, click the sort button in the header bar. This will bring up the sort menu. If your view has any sorts applied already, you’ll see them here; otherwise, you’ll see a message informing you that no sorts are applied to the current view.
- To apply a new sort, click the sort by dropdown menu.
- You can add more sorts by clicking on the Add more sorts and follow the steps to add a sort. You can remove any of the sorts you’ve applied by clicking the X button next to a sort, or reorder the sorts by using the drag handles.
Saving your table views
- All users are assigned a default view. The default view always has the row number and asset name frozen to the LHS of the table.
- Frozen columns do not scroll similar to a spreadsheet Freeze columns feature.
- The column width of the Asset name can be expanded.
- To add or remove columns in your default table view, click on the “Columns” button to select and move the display order of your columns in the table view.
- Your default view is fixed and cannot be updated.
Creating a custom view
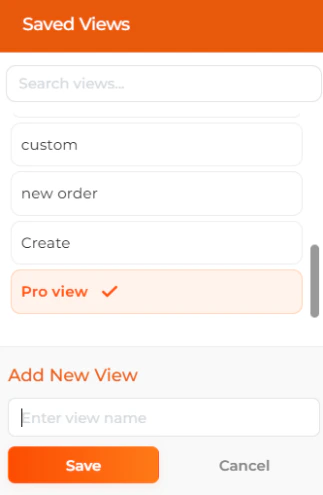
Deleting a custom view
- To delete a custom view, click on the view name and click on the “X” button beside the name.
Search (text search)
- The search function allows you to search most cell in your filtered dataset. Any record(s) that matches your text search will display in your table view.
- When you click on the search icon, you can enter your text in the text box, then press the enter key.
Advanced Search
The Advanced search function allows you build or create a picklist of assets in your table view based on textual search and selection. Unlike the search which is limited to your filtered dataset, the advanced search always searches your entire organisational data including missing assets. The advanced search is similar to the filter function, however limited to the asset name, serial, custom ID, part no, inspection checklist, assigned to, standard and batch numbes. Unlike the search which is limited to a single keyword, the advanced search can be progressively searched to build your data table view.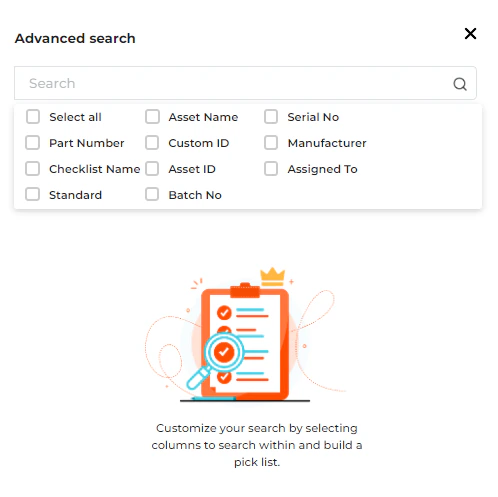
Scan (Now includes RFID tag, Serial no and Custom ID data)
- The scan function allows you to search the EZYiD, Serial number and Custom ID data columns only. The scan function does not require you to press the enter key after a RFID tag or QR Code or 2D code is scanned or read.
- To start scanning, click on the Scan icon on the Table navigation bar, a text box is opened and the table view of existing records is cleared.
- When a RFID tag is scanned, the Electronic Product Code (EPC) code is displayed in the text box and the record with the identical EPC code is found and displayed in the table.
- If scanned again, the new record with the EPC is added to the table row. This allows you to scan and build a table view to undertake other mobilisation and inspection functions.
- To Clear the table view filter conditions, click on the “Refresh” button on the RHS of the table navigation bar. This restores your dataset to the sites you have been assigned. Update my assigned sites
Table View Edit functions
Your data table view now includes more edit functions like cell edits, autofill, data dropdowns and date pickers.- To edit a cell, double click the cell and enter your data.
- To edit columns, hover over the column header and turn-on the column edit function.
- Use the enter key to move to the next column in edit mode or row below. Your data in the cell is validated after you have either clicked or pressed enter in the cell. UNVALIDATED data will be cleared when edit-mode is turned off and the table is refreshed.
- If a duplicate serial number or EPC code or custom id already exists in your organisation dataset, the cell is highlighted in “Yellow” with the error message “Record already exists”
- To undo changes to cell, you can now use the CRTL+Z to undo changes.
- To autofill a column, click on the data cell, hover over the blue square in the bottom RHS of the cell until your cursor turns to a cross. Now drag-down the rows you wish to update. The data will be pasted to all the cells highlighted.
- To undo an edit or an autofill, click on the Undo icon in the table header. You can undo up to 5 edits in the current release.
- Editing of cells is restricted when the data is used to calculate other cell data. The two cells that are restricted from editing are the Last Inspection date and Inspection frequency