Additional Information
Customers using the EZYiD Lite Mobile app
When a customer organisation is created by the EZYiD Manager, the customer will automatically have access one EZYiD Lite mobile account. The EZYiD Lite mobile licence allows the customer to access EZYiD lite either on a tablet or phone. As an EZYiD Lite user, you will have access to all sites, able to view all assets and its associated attributes, inspection history and technical documentation and undertake inspections, if qualified to do so.Customers accessing Inspection Certificates
Via the EZYiD Lite mobile app, the customer can access the inspection certificates of the assets completed by the EZYiD Manager. The EZYiD Manager will not need to send inspection certificates to the customer as all documents will be available in real-time via the app.Downloading and Printing asset records
To download the records in your table view, Click on the “Export” option in the Table Menu to download the list to excel for editing and reporting. You can also print the records to a PDF file to be able to present to customers.Printing a Table of Conformity
A Table of Conformity (ToC) is a record of an asset’s conformity to the manufacture’s usage standards. Information in the ToC includes the manufacturer’s date markings or recommendation, safety inspection information and the current status of the asset. The manufacture date markings are a guide to the shelf life or field use life of the asset. The safety data includes the timestamp of the inspection completed and when the next inspection is due. Key columns in the CoC are fixed as per the format defined below (Landscape orientation)- Column widths are fixed to the set character lengths as specified above.
- Right justified columns display info while truncating LHS characters greater than the column widths.
- Left justified columns truncate data to the right greater than the column widths
I want to digitally move my overdue inspection assets into quarantine
You have two choices to select and move the assets into quarantine. The first approach would be:- Click on the Overdue Inspection link
- Select the assets and refer to the “Completing inspections inhouse” for a detailed description of the bulk inspection process.
- To create an action, click on the Scheduler and follow the steps to create an action.
- Enter the action to be created
- Select the action type to be a “Safety Action”. Note: Safety Actions will change the status of the asset. This is always done via a checklist. If you do not have a safety action in your dropdown, refer to “Setting up your default preferences” section to setup your action type.
- Select the date to undertake the action
- Select the user to perform the action
- Select the assets by clicking on
 pick assets icon
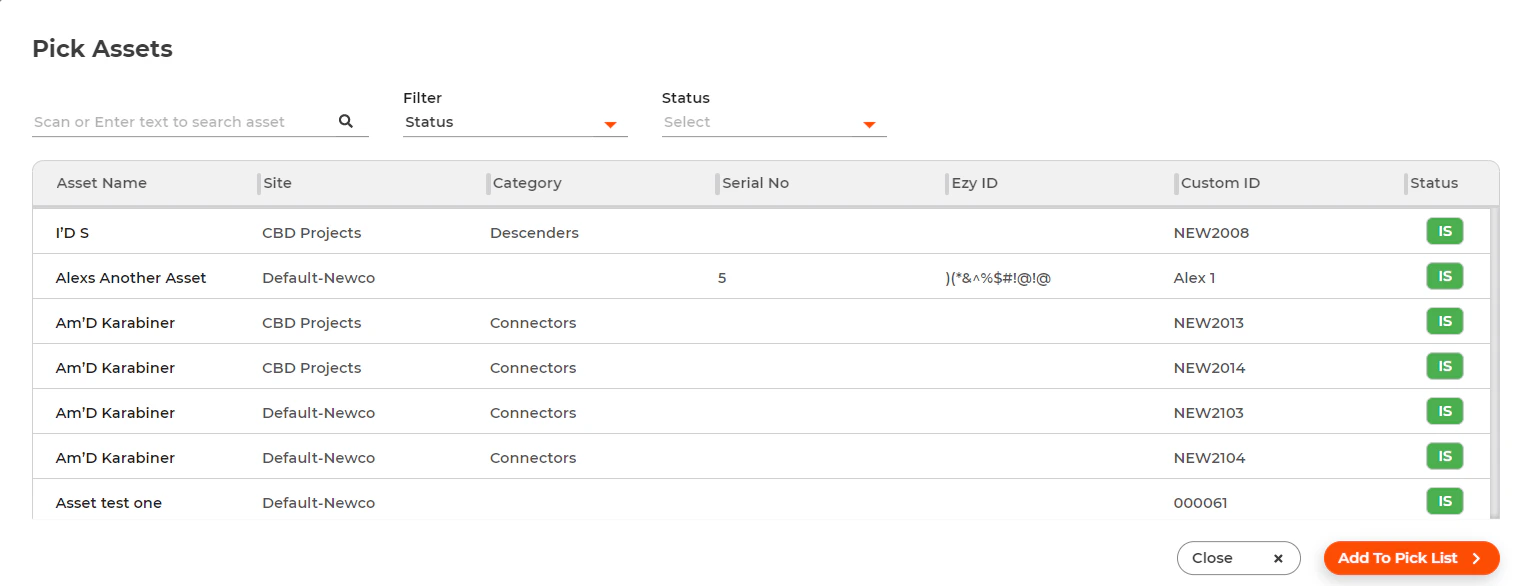
- Select the filter to “Status”
- In the Status dropdown, select “Overdue”
- The asset list will now be updated with all assets that have gone past its next inspection date
- Click on the list of assets you want to select or hold your shift key and use your down arrow key to select the assets scrolling to the end on the list at the bottom.
- Click on “Add to Pick List” to update your list of assets
I want to inspect asset using my mobile device
Download the EZYiD Remote worker from either Google Play store or the Apple App Store depending on your device.- Login to your EZYiD app with the username and password
- On the app dashboard, you can change your Site to the location you are at by selecting the
 icon on the LHS of the page.
 - Select the
 icon on the bottom navigation bar to move to the Inspection Dashboard;
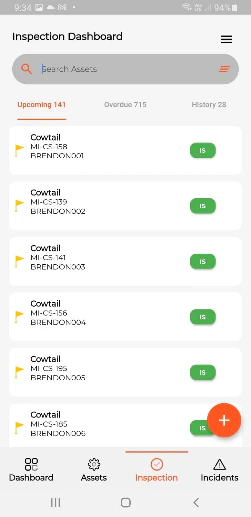
 The Inspection dashboard includes information of upcoming, overdue and historical inspections.
- To start a new inspection, Select the floating icon to scan your first asset;
- Note: When you scan your first asset, the EZYiD system established the rule for the rest of the assets to be scanned. All assets scanned as part of this inspection must have the same “Category” and “inspection checklist”.
- Eg. If you scan a helmet, then the system will not allow you to scan a karabiner as part of this inspection process.
- Select the “Inspect” button to complete the checklist associated with the assets;
 If you wish to capture the GPS location of your inspection, the checklist will request you to allow access to location services.
- Submit the checklist responses to complete the inspection.