GPS Asset Tracking
Assets that are tracked using GPS can transmit their location data using mobile phone or satellite networks, or a combination of the two (known as dual-mode) to make sure reporting is not interrupted when equipment moves outside the cellular network. EZYiD’s GPS asset tracking devices can be self-powered (with long lasting batteries) or hard-wired into the asset’s power source. GPS tracking devices can be set to check-in in near real-time (every 2 minutes) or hourly, daily, to less frequently depending on use case or need for extra long battery life. The default settings for your GPS trackers are:
The above default settings is to log movement, optimise data and battery energy usage in self-powered devices.
Currently all devices are provisioned over the Telstra NB-IOT network which offers the largest regional coverage area at speeds of upto 200Kbps.
 NB-IOT network coverage map
Asset trackers and uses
NB-IOT network coverage map
Asset trackers and uses
Provisioning your ActiveTag trackers
- Click on the RHS menu and select “System Defaults”
- Click on the “ActiveTag” tab to view used and unused devices.
- To activate a device, click on the radio button switch in the Active column. When activated the device serial number can be linked to your asset record.
- To link the ActiveTag to your asset, edit the asset and click on the “EZYiD Live” tab in the bottom LHS window of the asset edit window.
- Select the serial no of the provisioned device in the “Serial Number” dropdown
- Your ActiveTag is now linked to your asset or equipment and “Save” the record to close
Geofencing
A geofence is a virtual fence, perimeter or boundary around a physical location or customer site. Like a real fence, a geofence creates a boundary around your site separating your site from the rest of the area around it. A geofence boundary is used to detect movement (entry and breaches) of devices sharing location data. A geofence can be any size and shape. However, the current release only supports a circle shape. Future releases will allow you to draw the geofence over the desired geographic boundary. A geofence is made up of a collection of coordinates (i.e., latitude and longitude) or in the case of a circular geofence one specific lat/long location that forms the center.Geofence use cases
- Container tracking
- Fleet tracking
- Valuable and critical equipment tracking – NDT equipment tracking
- Masking trips taken during personal time, such as commuting, after-hours use.
- Protecting user location privacy when vehicles or assets are taken home.
- Preventing collection and exposure of sensitive organisation locations.
Geofence setup
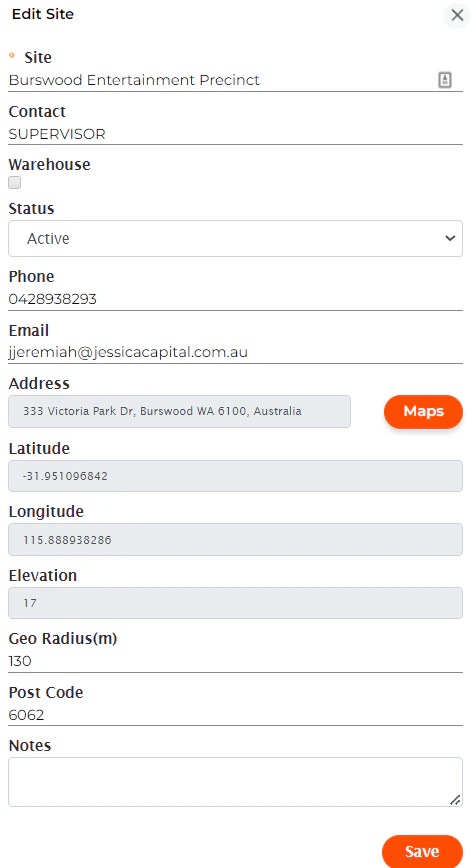
To setup your geofence around your site:- Click on the RHS menu and select “Sites”
- Click on the edit pen
 of the site you wish to update
 - Enter the Geo Radius in meters from the centre of the site location
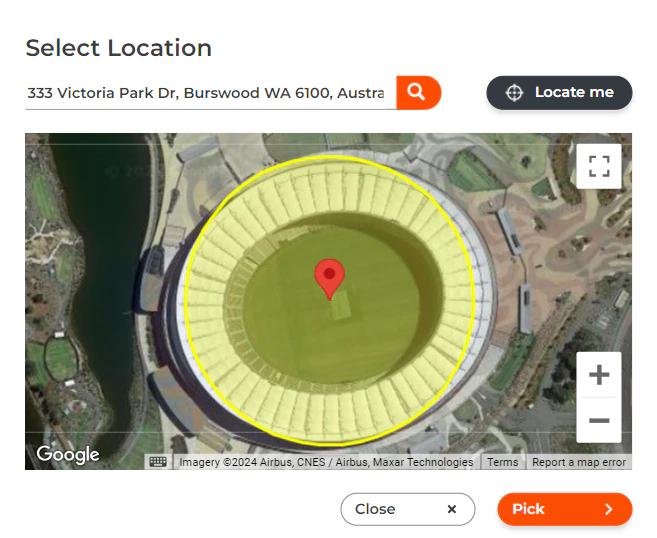
- Click on the “Maps” button and you will notice a yellow highlighted circle of the geo radius
- Once you have the right geofence around your site, Click on “Pick” to save the address.
- Click on “Save” button in the site page to save the settings.
Viewing your GPS location data
To view your asset movements and GPS data:- On the Dashboard, Click on the “Live Assets” tab and then click on the Name of the asset above the pin
- This will redirect you to the asset record in the table view screen
- Edit your asset by clicking on the Asset name and Click on the Map tab on the RHS Activity window
- Click on the Active Pin in the map window and Click on the “Show History” button
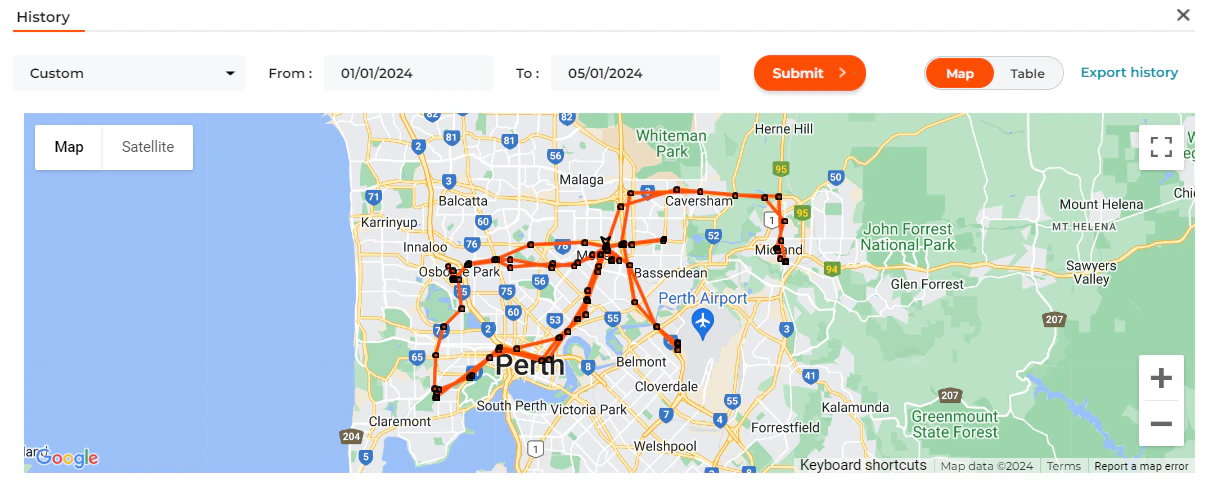
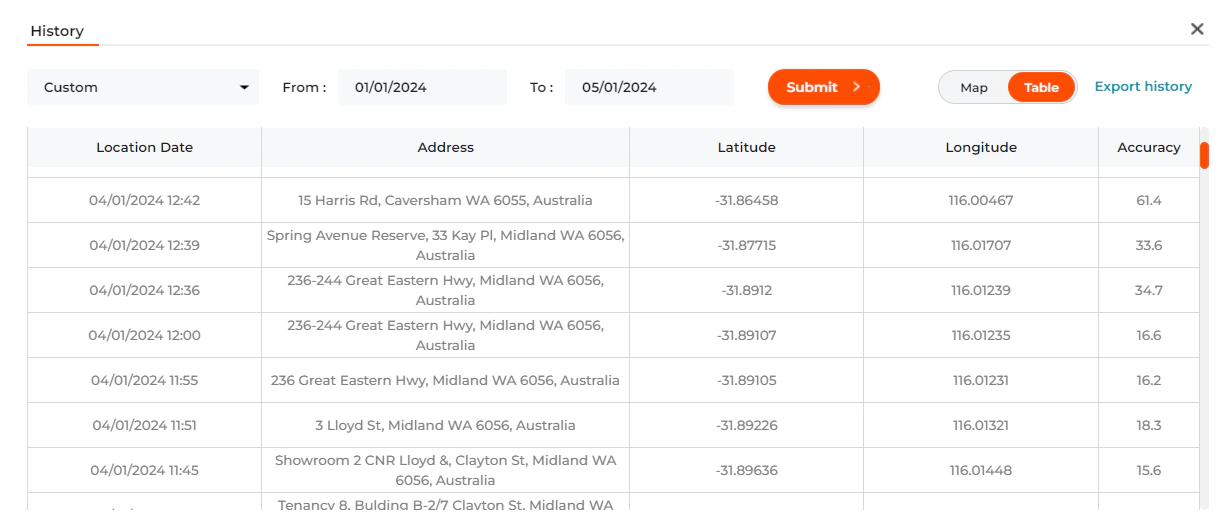
- The GPS movement History window will always default to today.
- Click on the “Today” dropdown to either view all or a custom date range.
- The GPS lat/long data can either be viewed in a table or on the map
- You can also export the table data by clicking on the “Export history” button
Detect and Monitor Geofence Breaches
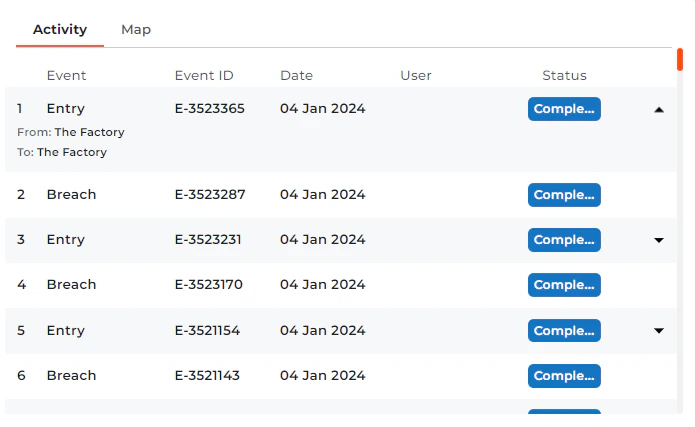
When a asset fitted with a GPS tracker is moved, the lat/long is registered. When the new lat/long of the asset breaches a designated geofence, an event is registered against the asset as a BREACH event in the activity log. A system notification is also sent to the site contact of such a breach. Similarly, when a lat/long enter a geofence radius/ area, an event is registered against the asset as a “ENTRY” event in the site geofence radius. A system notification is also sent to the site contact of such an entry.